In the previous blog post, we discussed vector search in Elasticsearch and how it operates. In this post, we’ll dive into implementing it using the latest content from Wikiquote as an example.
Table of contents
Preparing the Data
We’ll start by using a Wikipedia data dump, but we’ll focus on Wikiquote. Our base guide is the “Loading Wikipedia’s Search Index For Testing” blog post from Elastic, which you can find here. However, we’ll be making a few script changes, so stick around.
Download the Search Index Dump
Visit this link, and download the file named something like enwikiquote-$date-cirrussearch-content.json.gz. For this tutorial, we will use the latest Wikiquote search index dump: enwikiquote-20240902-cirrussearch-content.json.gz. Depending on your needs, you may download a different file.
Install the analysis-icu Plugin
Before proceeding, install the analysis-icu plugin on your Elasticsearch instance. We are installing the analysis-icu plugin because it integrates the ICU (International Components for Unicode) module into Elasticsearch, providing enhanced Unicode support.
This will be crucial for handling diverse languages, especially for better analysis of Asian languages, normalization, case folding, collation, and transliteration. Since Wikiquote content includes various languages, analysis-icu ensures proper text processing and search accuracy across multilingual data. Here’s how to do it:
- On Elastic Cloud:
- Go to your deployment in the Elastic Cloud console.
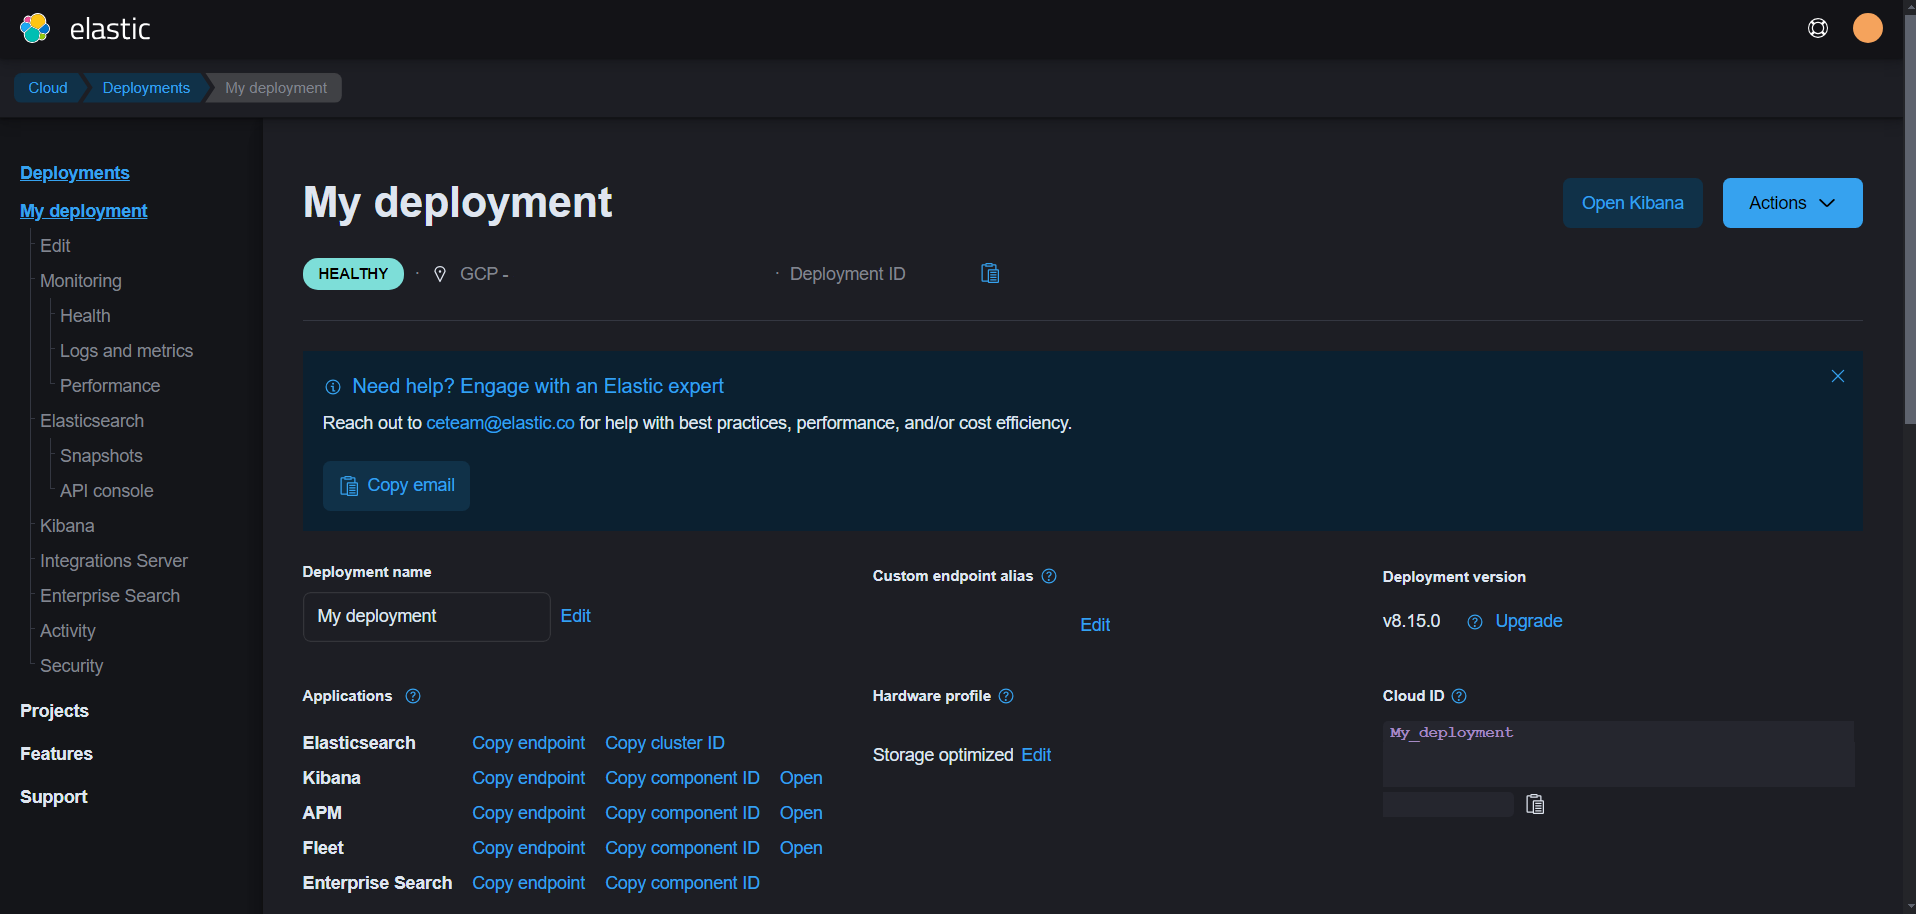
2. Navigate to “Edit”, and head to “Manage user settings and extensions”.
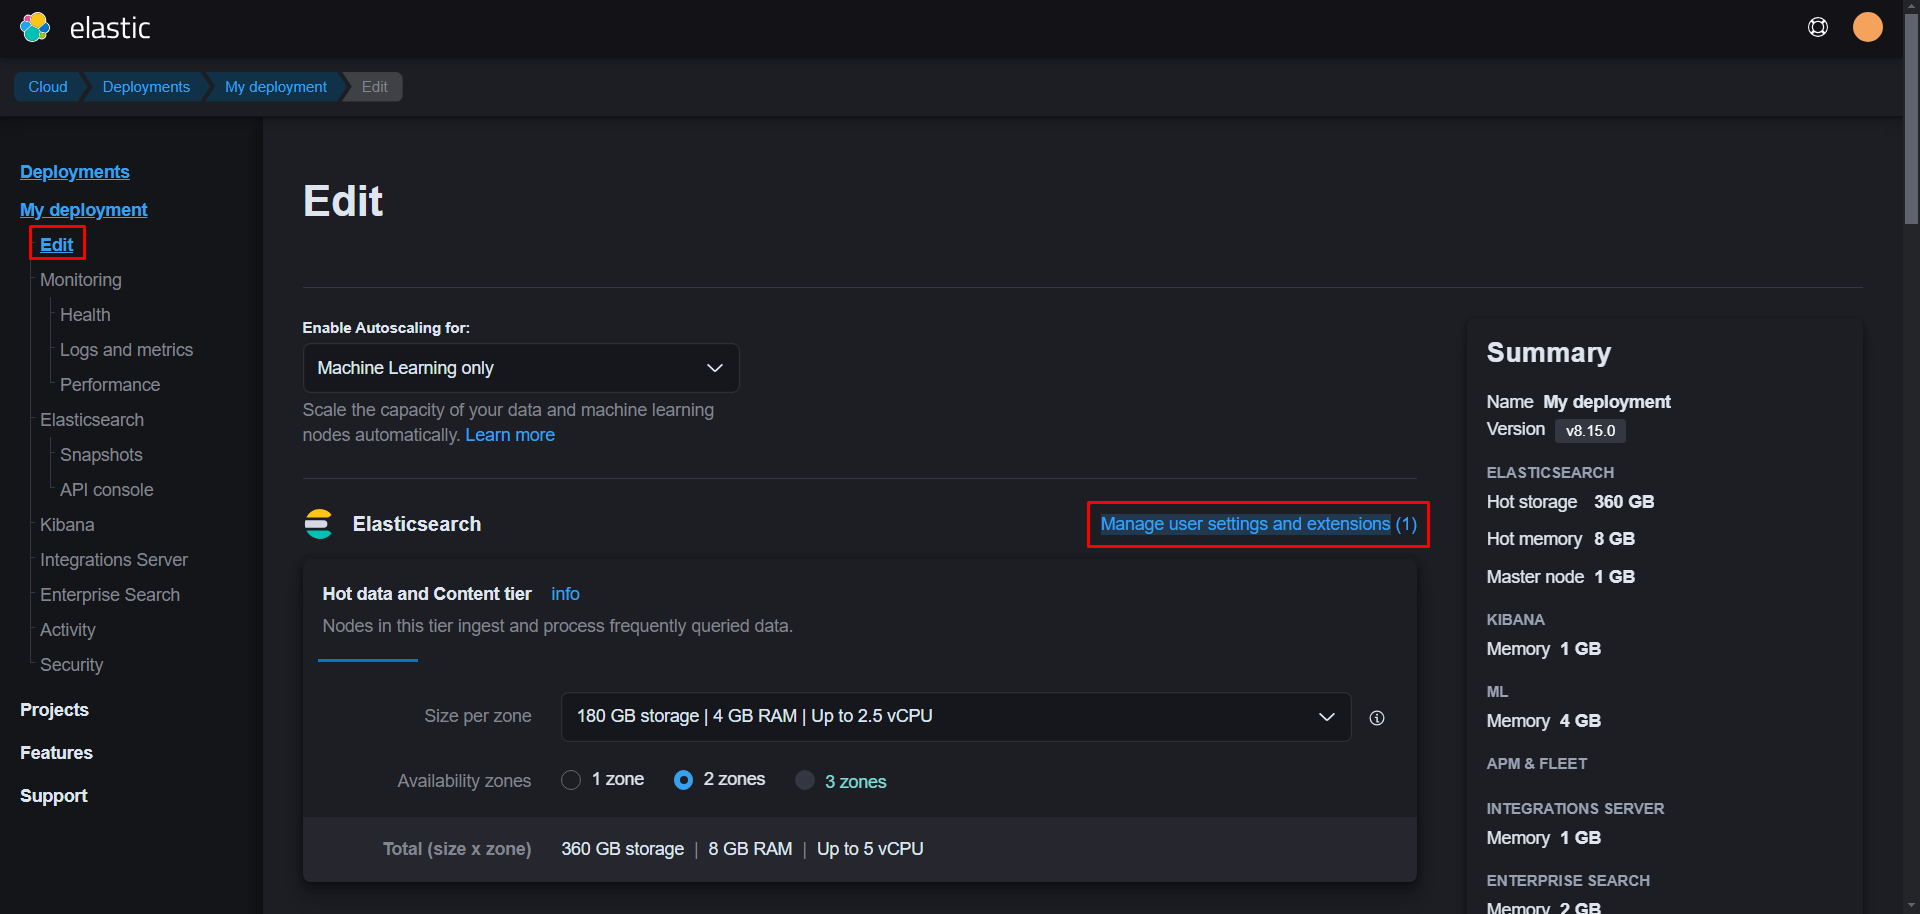
3. Under “Extensions”, add add analysis-icu.

4. Save and restart your deployment.
- Via Commands:
./bin/elasticsearch-plugin install analysis-icu
./bin/elasticsearch restart
Download the ELSeR Model
Next, download the ELSeR model using the following request:
PUT _inference/sparse_embedding/my-elser-model
{
  "service": "elser",
  "service_settings": {
    "num_allocations": 1,
    "num_threads": 1
  }
}
If you encounter a timeout, don’t worry. You can monitor the progress in Kibana under Machine Learning > Trained Models. For alternative methods of downloading ELSeR, check out this guide.
Methods for ingesting the data
There are 2 ways for us to do this method. We can either:
- Index data without custom pipelines, and reindex them with the model;
- Ingest our data with a pipeline, already vectorizing our field.
For this tutorial, we will use the first option, mostly to separate the steps of ingesting our data with actually vectorizing it.
Creating and Running the Scripts
Now, let’s create two scripts to ingest the Wikiquote data into Elasticsearch. The first script will chunk the data, and the second will load the data into the index.
Install jq
You’ll need jq for processing JSON data in the upcoming scripts. For this tutorial, we will be using Debian based distro for commands example. Install it using the following command:
sudo apt-get install jq
Chunking the Data
We will now split the Wikiquote dump into smaller chunks to process them more efficiently. We will be creating a script called script dump.sh:
export dump=enwikiquote-20240826-cirrussearch-content.json.gz
export index=enwikiquote
mkdir chunks
cd chunks
zcat ../$dump | split -a 10 -l 500 - $index
This script:
- Sets the dump file and index name.
- Creates a
chunksdirectory. - Uses
zcatto decompress the dump and split it into files with 500 lines each.
Shortly after creating dump.sh, run it on your machine. It shouldn’t take long to dump all the data from the compacted file. If everything went smoothly, you will end up with a folder called chunks, with many files as listed below:

Load the Data into Elasticsearch
Next, we load the chunks into Elasticsearch using the following load.sh script:
export es=http://localhost:9200/
export index=enwikiquote
export user=elastic
export password=password
cd chunks
for file in *; do
  sed -i 's/"_type":"_doc",/ /g' $file
  echo -n "${file}:  "
  request=$(curl -s -H 'Content-Type: application/x-ndjson' -u $user:$password -XPOST $es/$index/_bulk?pretty --data-binary @$file)
  took=$(echo $request | grep took | cut -d':' -f 3 | cut -d',' -f 1)
  printf '%7s\n' $took
  [ "x$took" = "x" ] || rm $file
done
This script:
- Sets up Elasticsearch credentials.
- Loops through each chunk file, removes the deprecated
_typefield, and sends a bulk request to index the data. - After processing, it removes the chunk files to free up space.
And as usual, after creating the script, you can run it on your computer. Keep in mind that this will take really long to finish ingesting ALL documents present on the search dump. If you wish to stop by the 5th dump, you may proceed with that, if you want to save some time.
Create the Ingest Pipeline
Once the data is loaded, we’ll reindex it using an ingest pipeline to vectorize the text. First, create the pipeline with this request:
PUT _ingest/pipeline/elser-v2-test
{
  "processors": [
    {
      "inference": {
        "model_id": "my-elser-model",
        "input_output": [
          {
            "input_field": "text",
            "output_field": "text_embedding"
          }
        ]
      }
    }
  ]
}
In short, the pipeline will take the text field and vectorize it into a new one called text_embedding. If we don’t have a proper field for ELSER, this will lead to the error "Limit of total fields [1000] has been exceeded while adding new fields" while we ingest our data with this pipeline. In order to avoid this, we will create a new index, where the field text_embedding with the vectorized data will be sparse_vector:
PUT enwikiquote_vectorized
{
  "mappings": {
    "properties": {
      "text_embedding": {
        "type": "sparse_vector"
      },
      "text": {
        "type": "text"
      }
    }
  }
}
Sparse vs. Dense Vectors in Elasticsearch
When working with vector search in Elasticsearch, you’ll encounter two main types of vectors: sparse vectors and dense vectors. These two types serve different purposes and are designed for different use cases. Understanding the distinction between them is crucial for optimizing search performance and resource usage.
Sparse vectors are ideal for feature-based searches where most dimensions are zero or missing. They store only non-zero values, making them memory-efficient and useful for tasks like semantic search with models like ELSER. Sparse vectors allow multi-value inputs and aggregate features by selecting the maximum value for overlapping terms.
Dense vectors, in contrast, store all dimensions and are designed for similarity searches, such as k-nearest neighbor (kNN). They’re commonly used with embeddings and support efficient retrieval through algorithms like HNSW. While memory-intensive, they can be quantized to reduce the footprint.
In short, use sparse vectors for flexible, feature-weighted searches and dense vectors for similarity-based tasks. For this tutorial’s sake, we will be using sparse vectors, since ELSER only supports this type when compared with dense vectors.
Reindexing the Data with the ELSER Model
Now, reindex the data into this new index using the ingest pipeline:
POST _reindex
{
  "max_docs": 500,
  "source": {
    "index": "enwikiquote",
    "size": 50
  },
  "dest": {
    "index": "enwikiquote_vectorized",
    "pipeline": "elser-v2-test"
  }
}
We’ve limited the process to 500 documents for tutorial’s sake. If you wish to ingest all the documents with the ELSER model, you can go ahead, be warned about the time it will take to reindex all of it, though.
Test the Vector Search
Now, you can run a vector search query using the ELSER model:
GET enwikiquote_vectorized/_search
{
    "_source": {
      "excludes": [ "source_text", "text_embedding", "template" ]
    },
   "query":{
      "sparse_vector":{
         "field": "text_embedding",
         "inference_id": "my-elser-model",
         "query": "romantic drama before 2005"
      }
   }
}
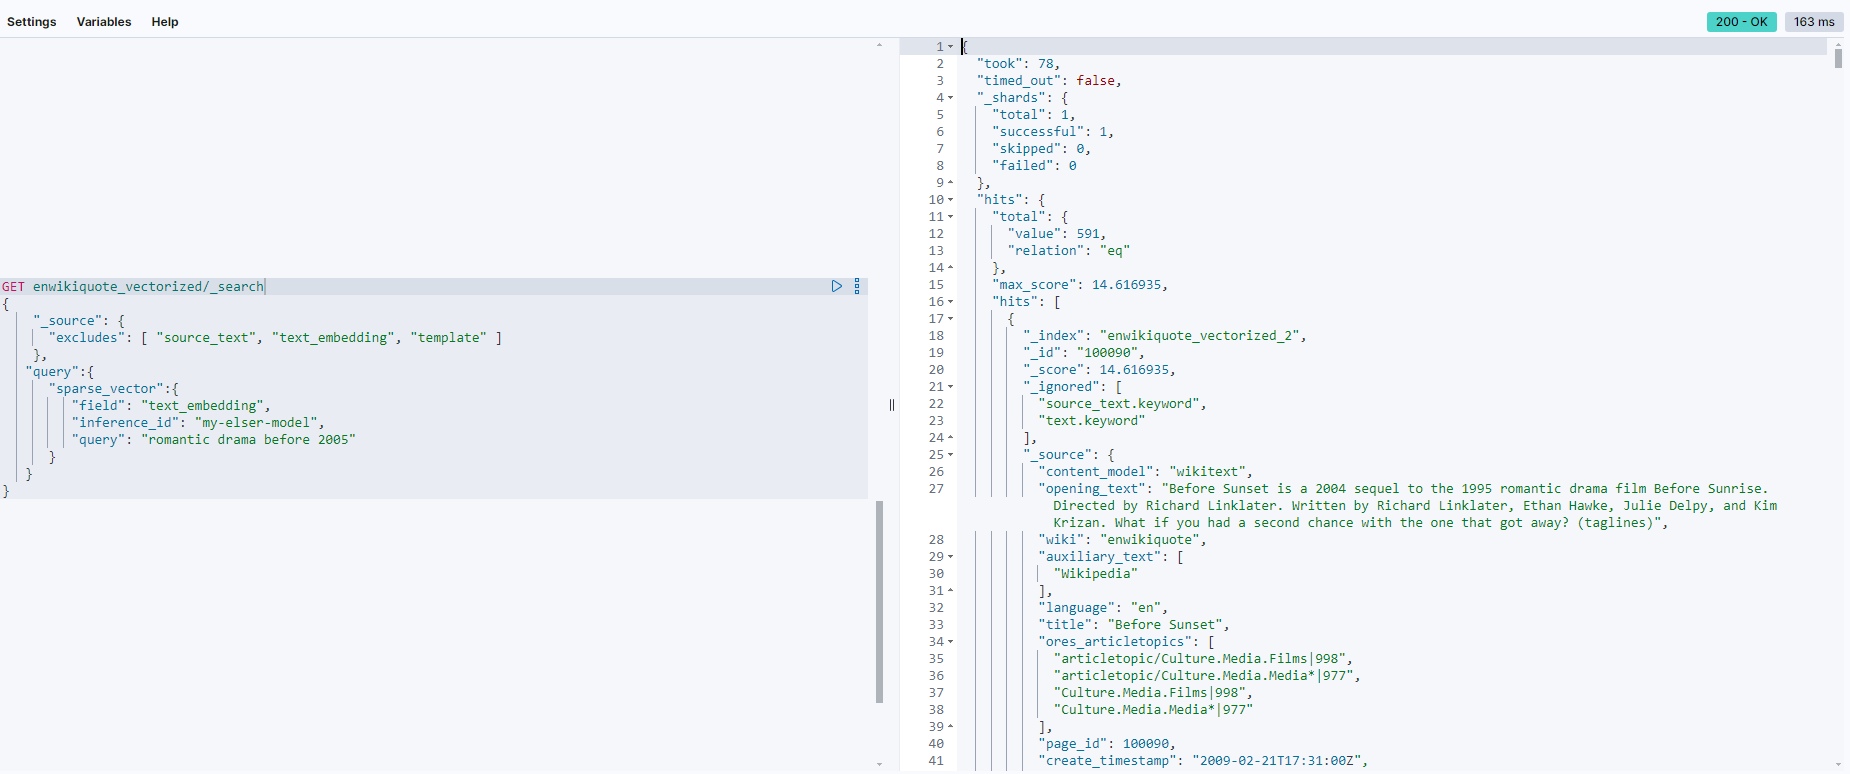
When searching with ELSER (Elasticsearch Learned Sparse Encoder Representations), you can expect improved efficiency in cases where the semantic meaning of a query might not be directly reflected by simple keyword matches. For example, ELSER will perform better when searching for synonyms, related phrases, or conceptually similar ideas. Here’s an example where ELSER can outperform regular lexical search:
Lexical Search Query:
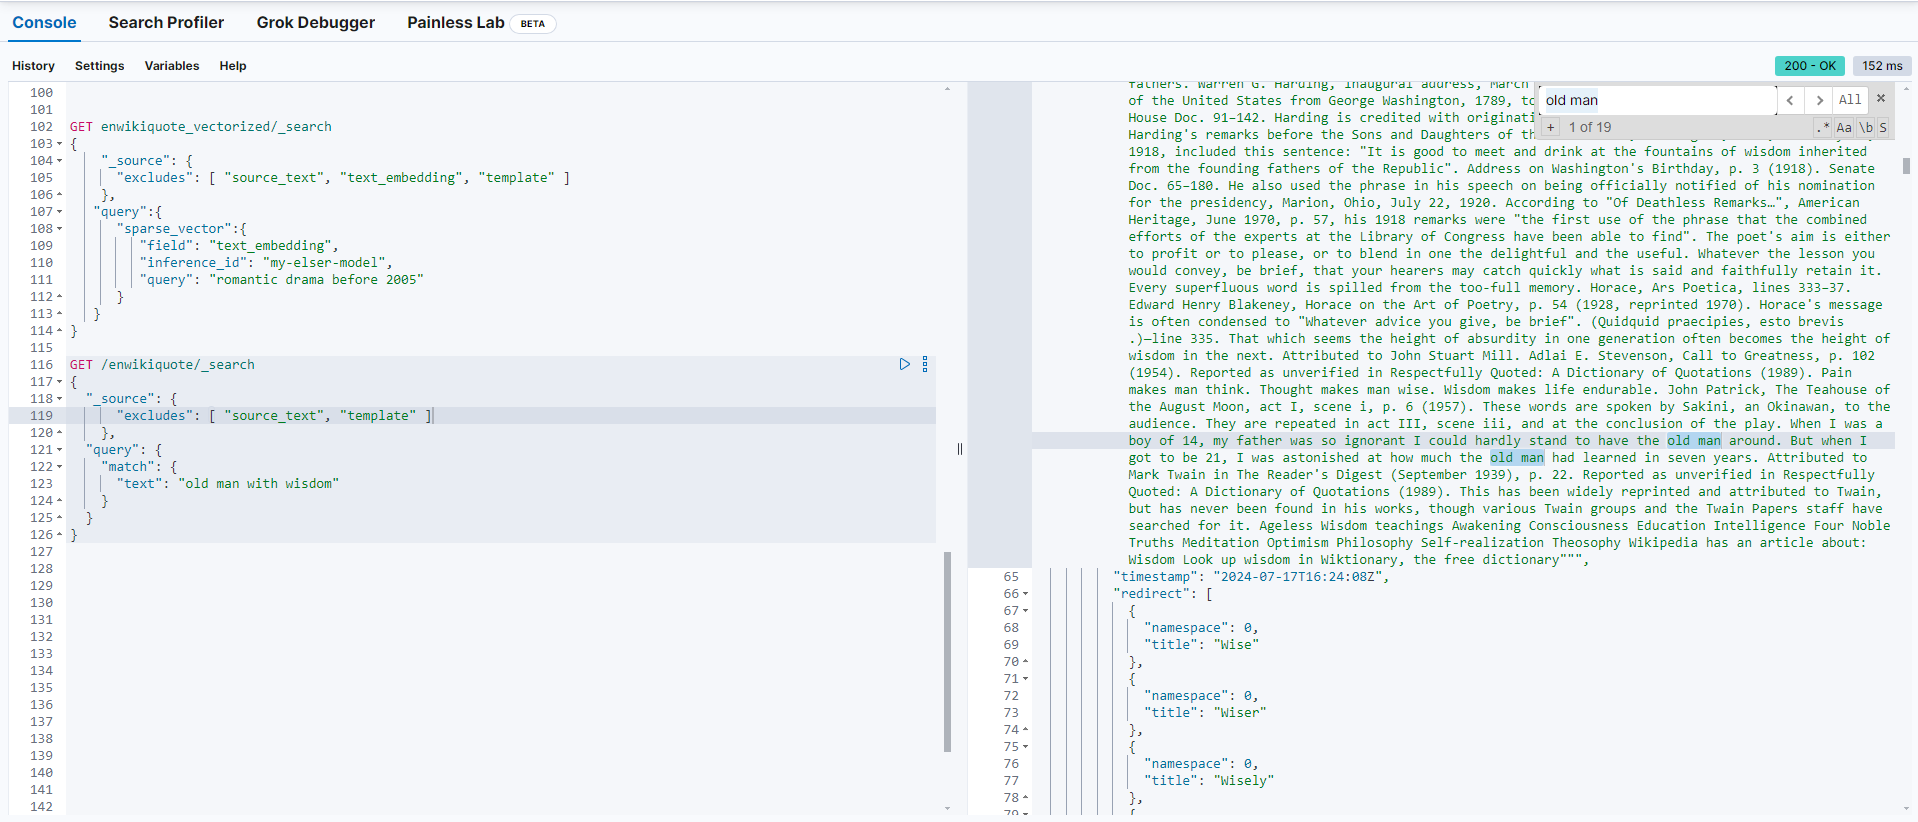
GET /enwikiquote/_search
{
  "_source": {
      "excludes": [ "source_text", "template" ]
    },
  "query": {
    "match": {
      "text": "old man with wisdom"
    }
  }
}
In this regular search query, Elasticsearch tries to find exact or close matches to the phrase “old man with wisdom” in the documents, focusing on the occurrence of these exact terms:
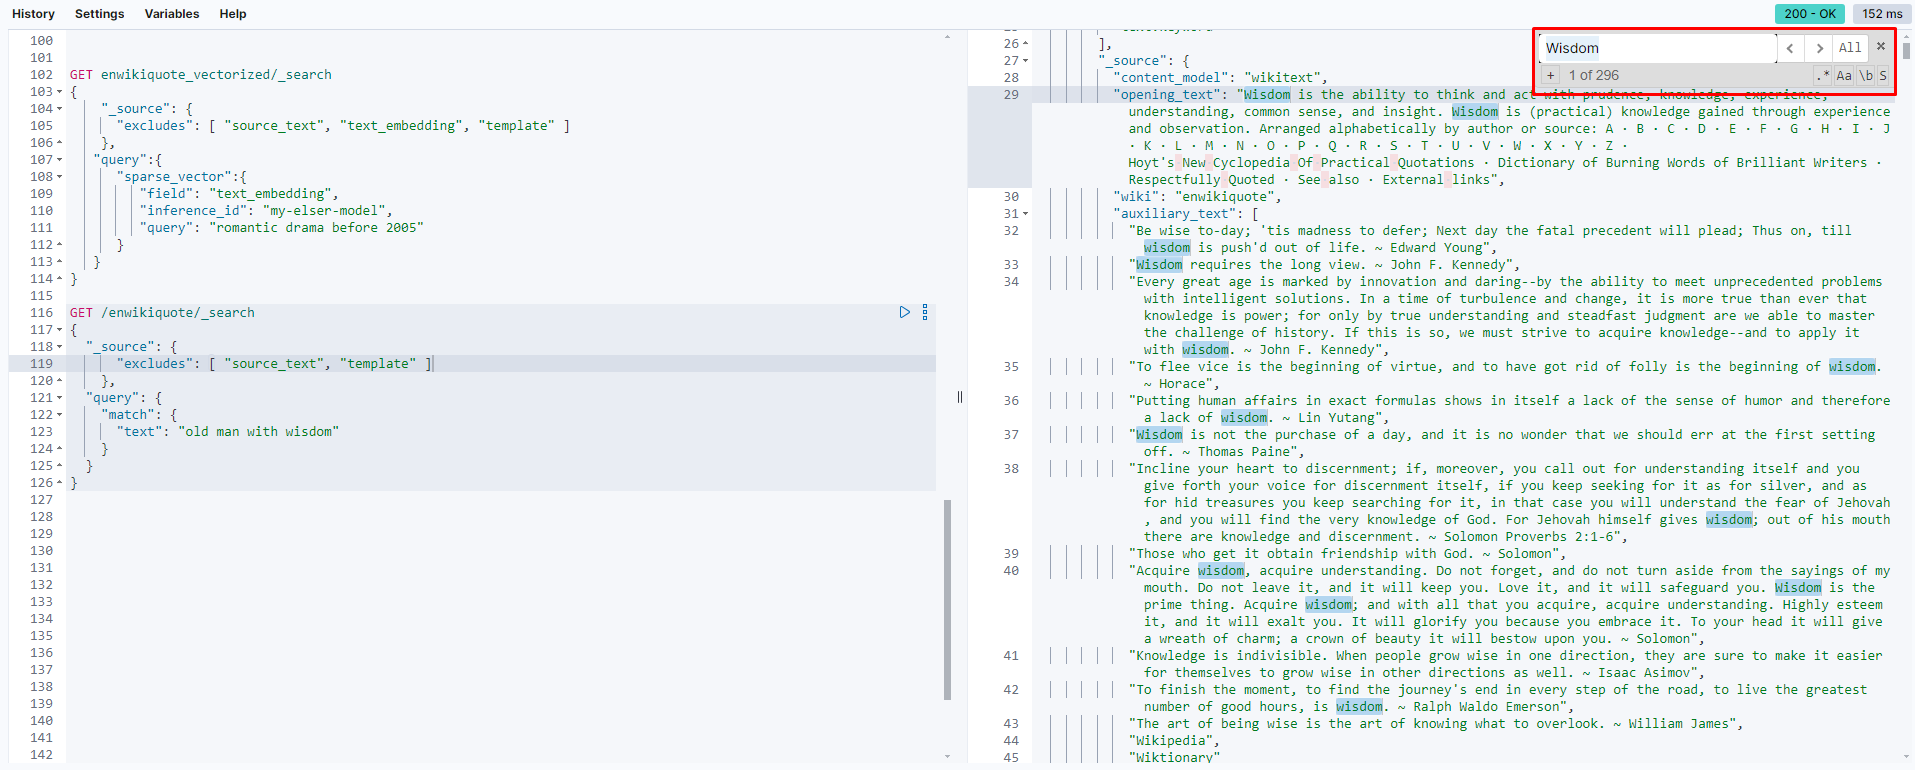
ELSER Query for Semantic Understanding:
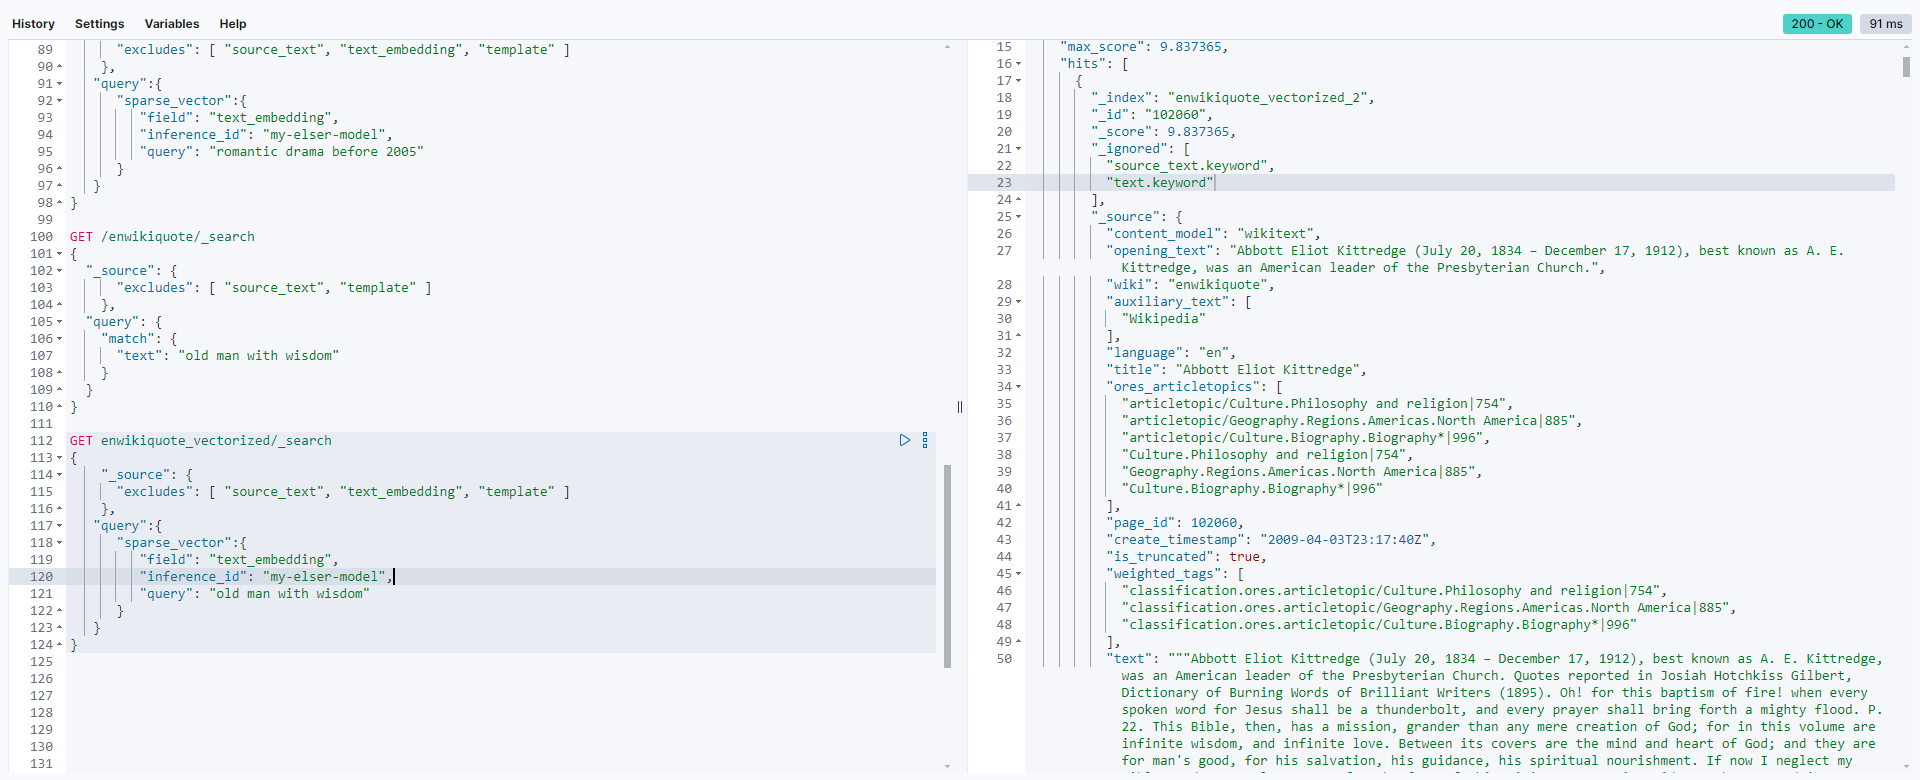
GET /enwikiquote_vectorized/_search
{
    "_source": {
      "excludes": [ "source_text", "text_embedding", "template" ]
    },
    "query": {
      "sparse_vector": {
        "field": "text_embedding",
        "inference_id": "my-elser-model",
        "query": "old man with wisdom"
      }
    }
}
With ELSeR, the model generates vector representations that capture the semantic meaning of the phrase “old man with wisdom.” This enables the search engine to return results that might not contain those exact words but relate to the broader concept, such as:
- Quotes about elderly wisdom.
- Synonyms like “senior with knowledge” or “wise elder.”
- Phrases that imply similar meanings but use different language.
In cases where synonyms, analogies, or deeper semantic similarities are key, ELSeR will outperform the traditional search in terms of relevance, as it looks beyond just matching keywords and focuses on context and meaning.
Results Comparison (Lexical vs. Semantic Search)
- Lexical Search (First Query):
- The engine retrieves documents where the terms “old,” “man,” “with,” and “wisdom” appear in the
textfield. The exact phrase may not always match, but there is a higher focus on documents with similar word patterns. - Example result: You could retrieve documents related to historical figures or literature referencing an “old man” or containing “wisdom” in direct quotes or titles, such as the Havelok the Dane entry.
- Results might have less flexibility in understanding abstract contexts like “wisdom” without literal mentions.
- The engine retrieves documents where the terms “old,” “man,” “with,” and “wisdom” appear in the
- Semantic Search (Second Query):
- The search attempts to capture the conceptual meaning of the query “old man with wisdom,” so it may retrieve documents that don’t contain those specific words but are conceptually aligned with the idea.
- Example result: It might bring back a document on a historical or literary figure like Abbott Eliot Kittredge or Keshia Chante, even if they don’t directly mention “old man” or “wisdom,” but because the overall vectorized content implies philosophical wisdom or an elder’s wisdom, making the model infer such connections.
- This can yield broader results in meaning rather than exact wording.
Conclusion
In this blog post, we explored how to implement vector search in Elasticsearch using Wikiquote’s latest content. We began by downloading the search index dump and setting up the necessary tools and plugins, including the ELSER model for vector embeddings. Through a series of steps, we chunked the data, ingested it into Elasticsearch, and created an ingest pipeline to vectorize the text fields.
By reindexing the data and performing vector searches, we harnessed the power of Elasticsearch’s vector capabilities to perform more nuanced and efficient searches based on semantic content. This setup not only demonstrates the flexibility and power of Elasticsearch but also highlights the benefits of using vector embeddings for advanced search applications.
Whether you’re working with large datasets or looking to enhance your search capabilities, these steps provide a solid foundation for integrating vector search into your Elasticsearch setup. In our next post, we will combine and cover on how to give AI Insights to our semantic context search we just did on this guide with python and html.