Managing your Elasticsearch monitoring instances is crucial for maintaining the health and performance of your Elasticsearch clusters. Our platform provides an easy way to monitor your instances, configure alerts, and ensure you are always notified about important events. In this guide, we’ll walk you through how to set up a new notification for your instance using Slack, and how to create a Slack app to enable these notifications.
Currently on our platform we provide 2 ways for you to be notified about critical alerts from your monitoring instance, which are Slack and a Webhook Dispatcher.
What is Slack?
Slack is a powerful collaboration tool that facilitates communication within teams. It offers real-time messaging, file sharing, and integrations with numerous apps and services, making it a central hub for team communication and project management. In our platform, Slack is used to deliver instant notifications about the status and health of your Elasticsearch monitoring instances.
What is Webhook Dispatcher?
A webhook dispatcher is a mechanism that allows one system to send real-time data to another system via HTTP requests. It works by “hooking” into an event in the originating system and “dispatching” data to a specified URL when that event occurs. This setup is commonly used for integrating different applications, automating workflows, and sending notifications.
On our platform, the webhook dispatcher enables you to receive customized notifications from your Elasticsearch monitoring instances. By configuring a webhook URL, you can direct these alerts to any endpoint that can process HTTP requests, such as automation scripts, or other notification systems. This flexibility ensures that you can integrate our monitoring service with a wide range of tools tailored to your specific needs.
Table of contents:
Accessing Your Instances
First, log in to your account on our platform and navigate to the “My Account” page. Here, you will see a table listing all your monitoring instances. Here is how the page will look like if you already have an instance up and running:
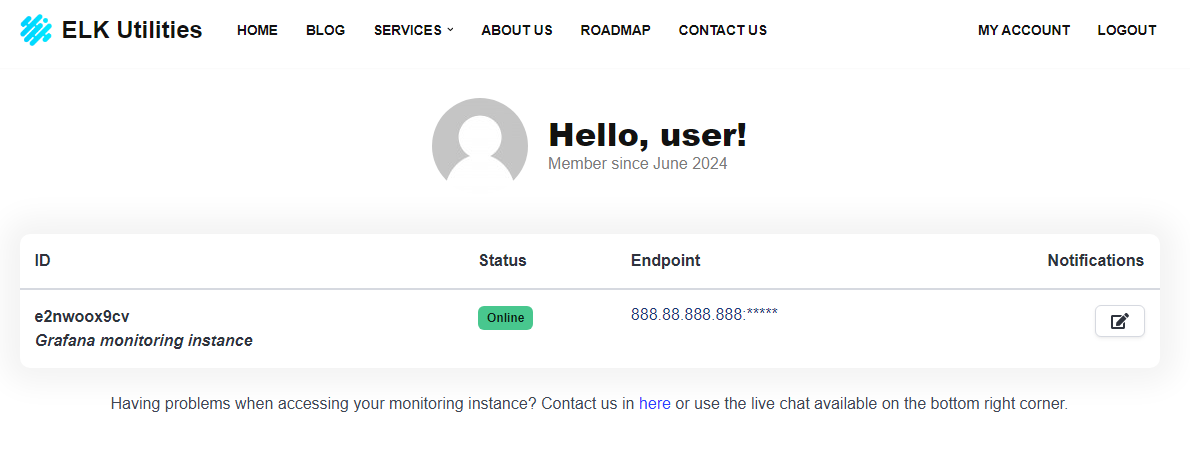
If you don’t have any instance running on our platform, you can start a free trial by following this blog post.
Modifying Notifications
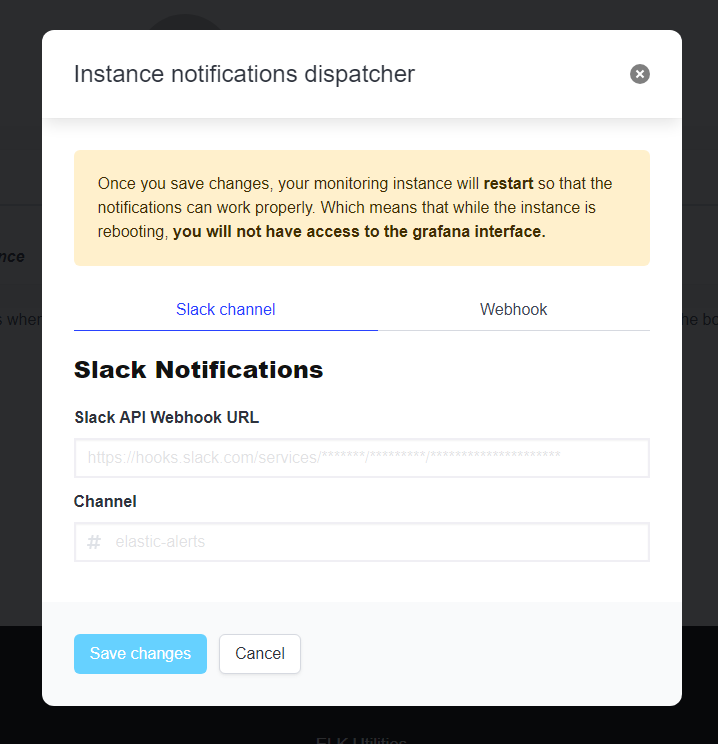
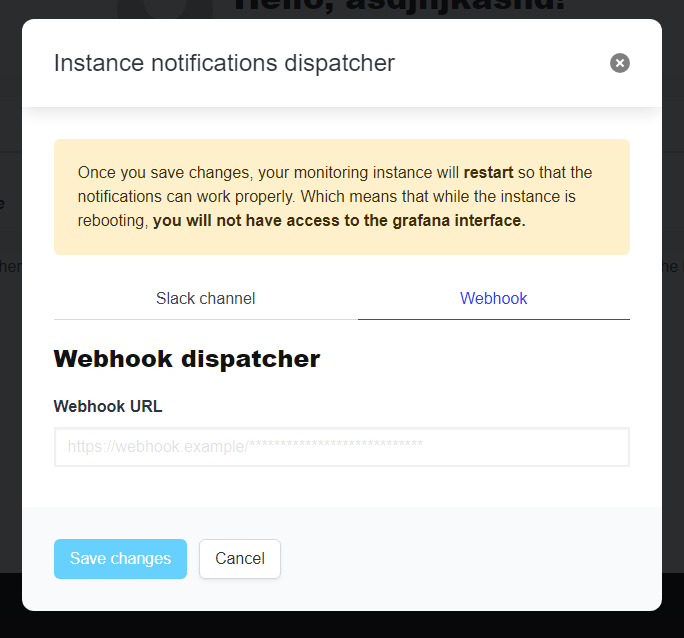
To modify the notifications for a specific instance, locate the instance in the table and click the Edit Button in the “Notifications” column. This will open a modal where you can configure various alert options. After clicking on Save changes, your instance will restart, so that the changes you made will be saved and be working immediatly
In the modal, you will see two main sections for notifications:
- Slack Notifications
- Webhook Dispatcher
Slack Notifications
If you wish to receive critical alerts about your Elasticsearch cluster in your Slack workspace, follow the guide below for a step-by-step process on how to achieve this.
To enable Slack notifications, you need to provide:
- Slack API Webhook URL
- Channel
Create a New Slack App
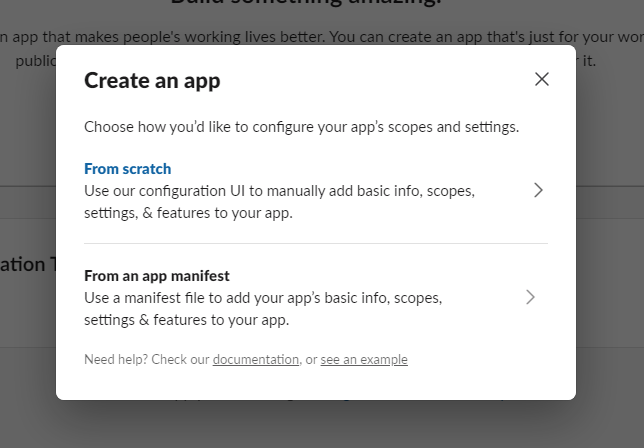
Go to the Slack API: Applications page, click on the Create New App button and choose the option From scratch.
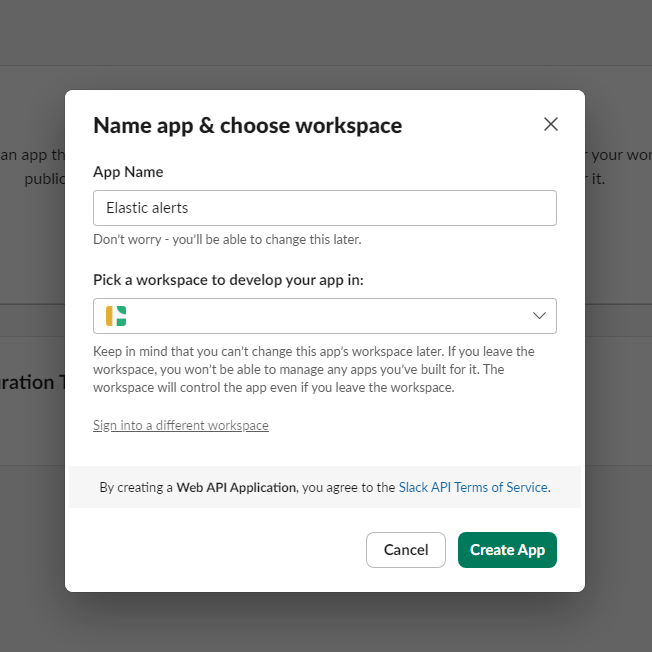
Enter a name for your app and select the Slack workspace where you want to install the app, and once that’s done, click Create App.
Configure Incoming Webhooks
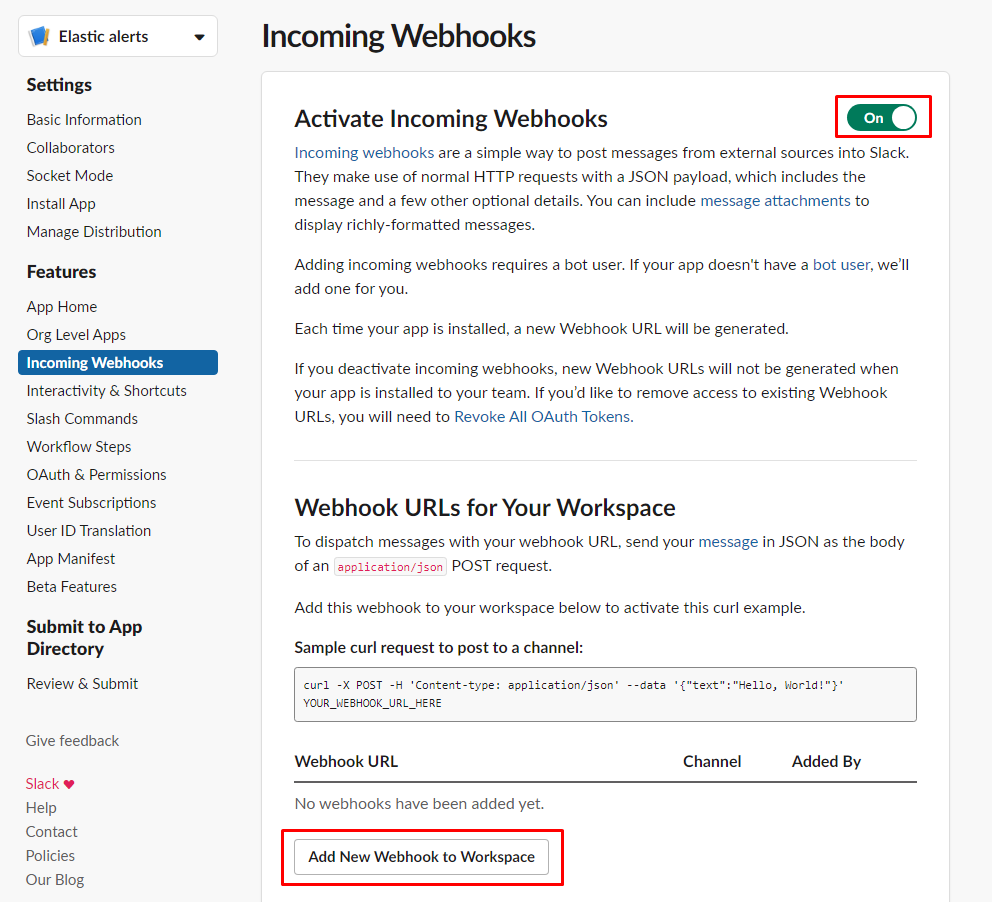
Once your app is created, go to the Incoming Webhooks feature under the Features section in the sidebar.

Toggle the switch to activate Incoming Webhooks. and click the Add New Webhook to Workspace button.
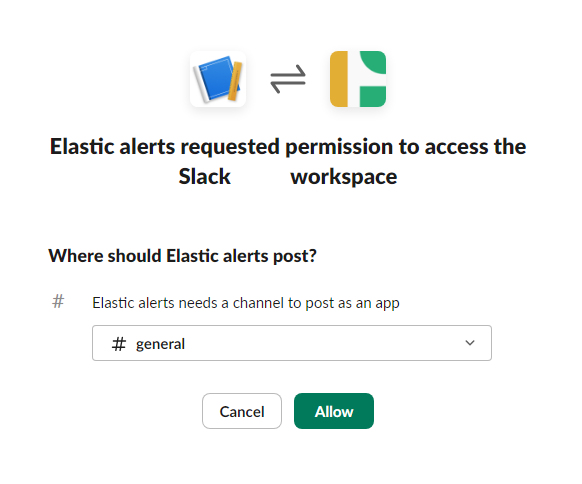
Select the channel where you want to send notifications and click Allow.
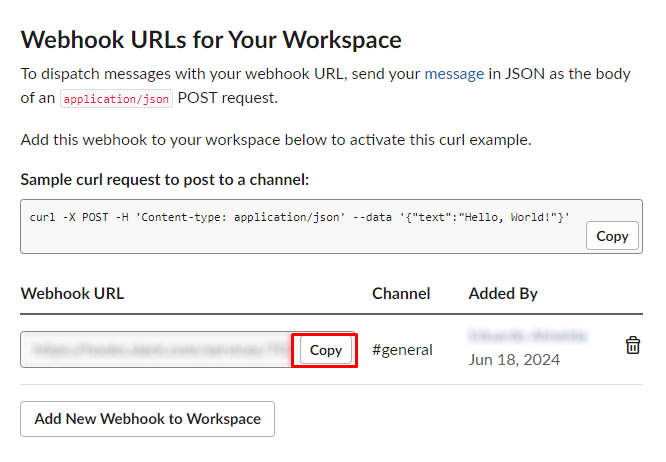
You will be provided with a Webhook URL. Copy this URL and the channel name.
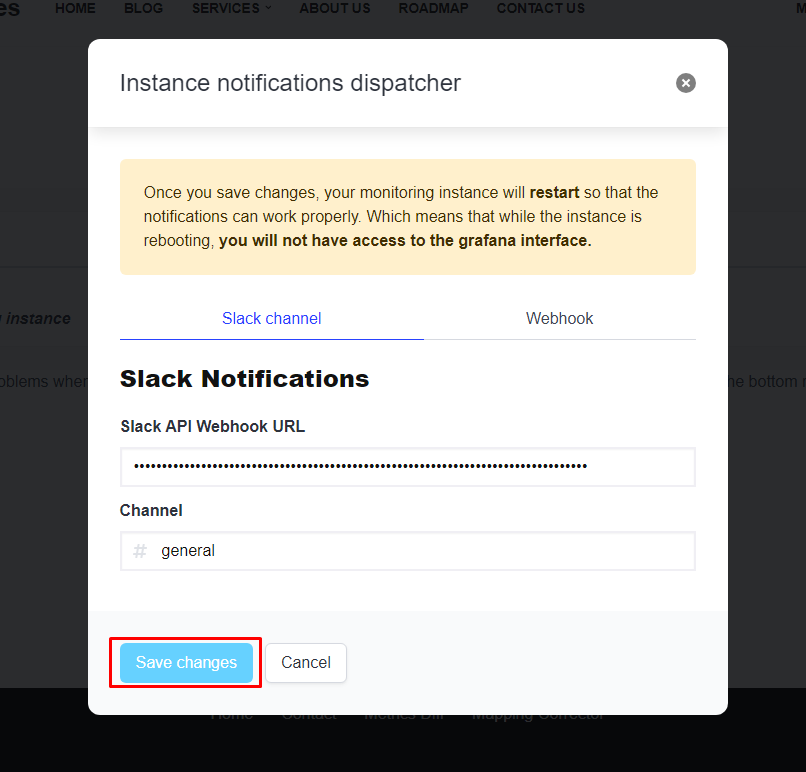
Add Slack’s API Webhook URL and Channel in the Platform
In the notification modal on our platform, paste the copied Webhook URL into the Slack API Webhook URL field, and enter the Slack channel where you want to receive the notifications in the Channel field (e.g., #elastic-alerts).
If everything went smoothly, your alerts should be working! Below is an example of how it should look like if your instance starts firing critical alerts:

Webhook Dispatcher
To enable the Webhook Dispatcher, you will only need to provide a link from a webhook that you want to receive alerts.
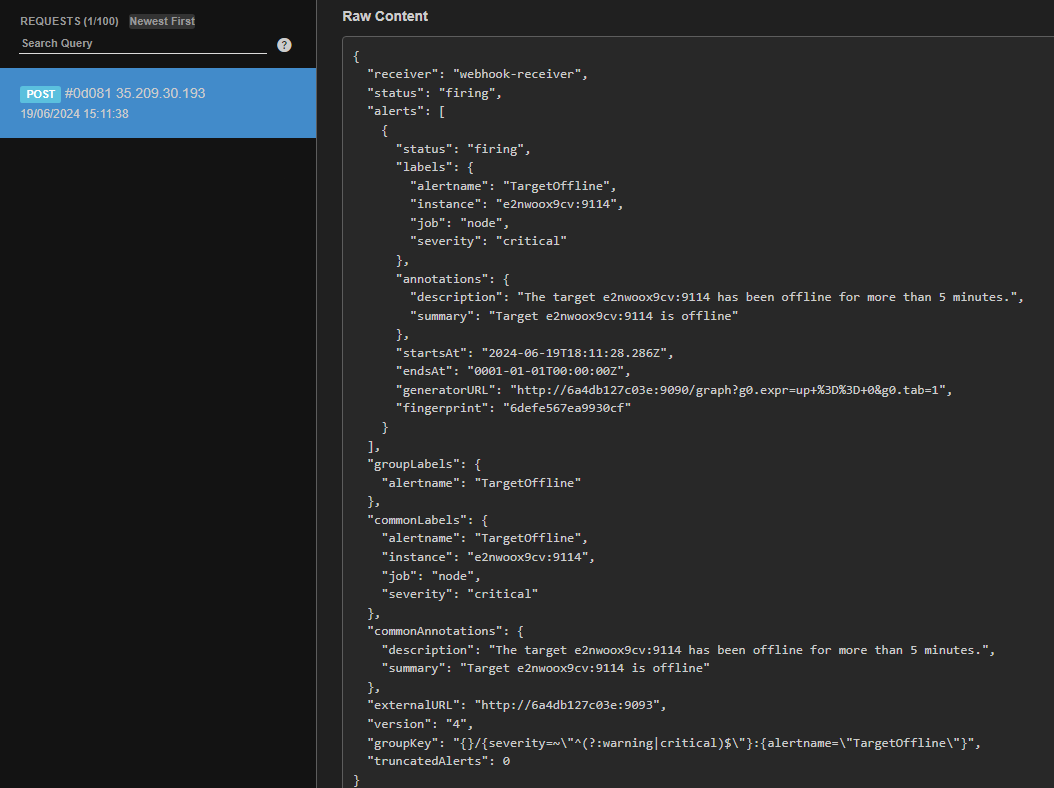
By providing any webhook link, your alerts should be working! Below is an example of how it should look like if your instance starts firing critical alerts:
Conclusion
By following these steps, you can easily set up notifications for your Elasticsearch monitoring instances and stay informed about important events through Slack. Creating a Slack app and configuring the Webhook URL ensures that you receive timely alerts and can take action promptly to maintain the performance and reliability of your Elasticsearch clusters.
Stay proactive with your monitoring and keep your Elasticsearch instances running smoothly! If you have any questions or need further assistance, feel free to reach out to our support team.